Showing posts with label diy. Show all posts

Thursday, November 15, 2012

Furball Printables

It's my favorite day of the week thanks to Stephanie & Katie's fab link up!
Saw it. Pinned it. Did it.


I’m kind of a sucker for printables, so when I kept coming across these dog silhouette prints on pinterest I knew I had to recreate one of my one and only furball, Dakota. 

via
via

And to answer your question, NO, it is not a 20"x24" print on my wall!!  
Let's not be that girl! 
I merely made an 8x10 to frame for my gallery wall.

Who am I kidding? Yes! I’ve turned into that lady that loves her dog so much, 
she has to have all things cocker…  
HOWEVER, you will NOT find me sporting the “I love my dog sweatshirt”

 Nor do I have the “my cocker is smarter than your honor student" bumpersticker...

Y’all, I haven’t even put this “guard dog” sign in the front yard… yet!
jk. it won’t happen, promise!

BUT, I do love my little girl, so any artsy way to display my love for her,
WILL HAPPEN!

All you need:
An internet connection
Photo editor website (photoshop/pixlr)
Clipart
Printer
Frame
 ADORABLE DOG for inspiration!

I chose to go with pixlr editor (advanced).
Open a "new image," which I used 1024x768, then open your clip art.
Simply use your magic wand tool to select your clip art & "move" it to your "new image" page, finally use your paint bucket tool to color the designated areas.

Volia! 


For now, she's propped up on the tv stand until my gallery wall gets going...


Monday, November 12, 2012

Weekend Recap

Happy Monday! Not! Well at least it’s not your normal Monday, over here anyway. 
Working for the govt has its perks, you receive Floating Holidays!
(aka. work, said holiday, and get an extra day off!) I chose the latter, obvi! 

So my day off was Friday, and what’s a girl to do when the Nutcracker Market comes to town?! Put on your newest riding boots (lots of walking), grab your girls and get to shopping. If you want see grown women dressed to the nines and running around like chickens scouting the nearest bar for their next glass of champagne... Get in line! And yes, there is a LONG line!

If anything will get you into the Christmas spirit, it’s the Nutcracker Market. People are everywhere, buying gifts and things they don’t need, BUT it is magical!

And being the DIYer that I am, I’m taking pics of “all the things I can make myself!” 
Yes, I’m that girl! 
1. Burlap Stockings
2. Painted Letters
3. Sparkly Wreath
           
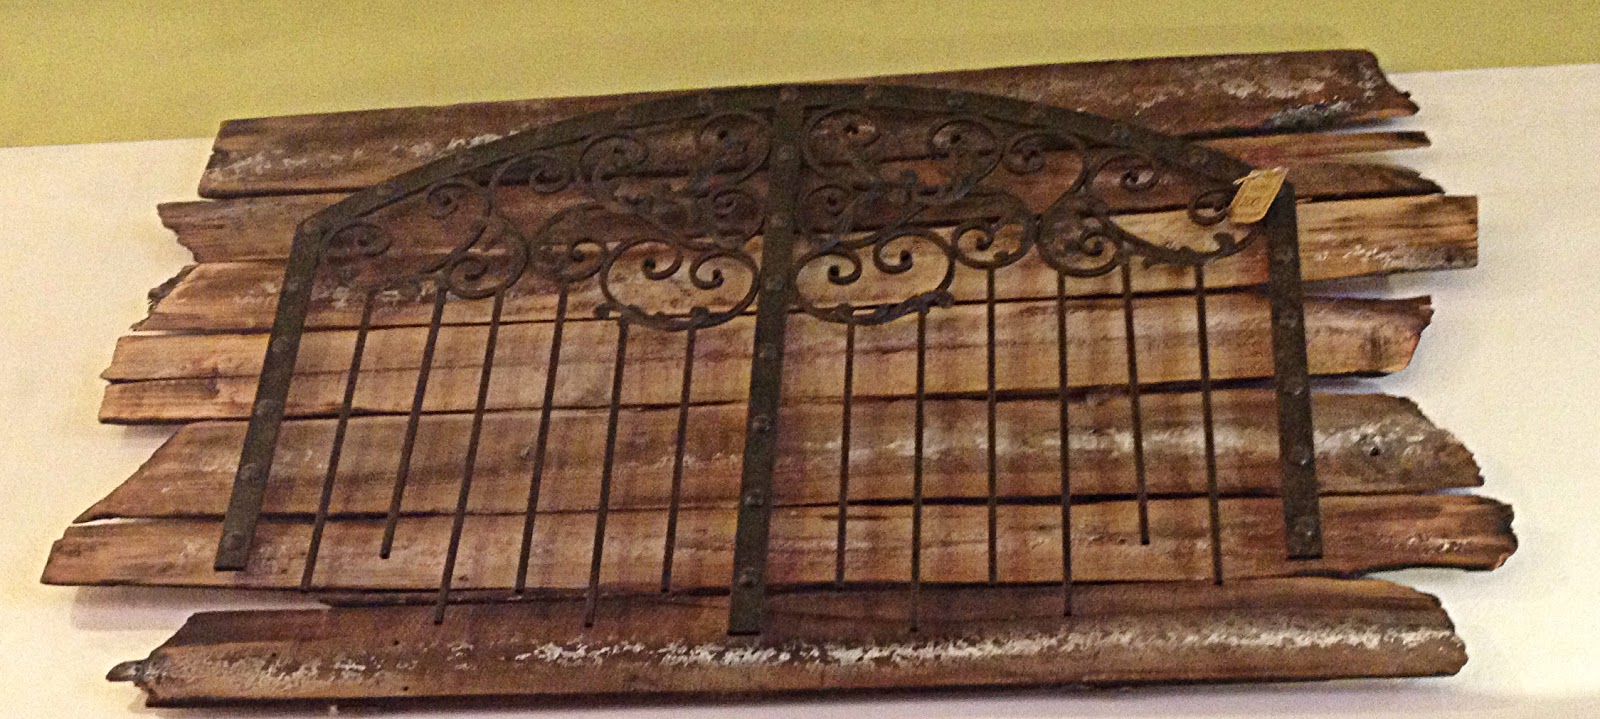
Yes, I have lived in Texas my entire life, but I've never been interested in Texas/Rustic decor... until I met this guy a few weeks ago... 

Add bling or shimmer to ANYTHING and I WANT IT!! 
Insert this beauty:
 He had a pretty gorgeous price tag too of $2,500.


The rest of the weekend was devoted to football! Who doesn't love a reason to tailgate?! 
Plus, it was homecoming weekend for the UH Cougars! 


We mosied (stumbled) on over to PubFiction to watch the A&M game... i must say, if you're not an A&M fan, just watch a game with these people and they will convert you. It probably didn't hurt that they beat the #1 team or anything... 

Have a great week!! 
Tune in: some pretty exciting news is coming at the end of this week!!


Thursday, November 8, 2012

Colorful Streamer Backdrop


I have been looking forward to this day ALL week, not only because today is my Friday (whoop!) 
but because it’s time for another round of…
Saw It. Pinned it. Did it.
Did anyone else say that in the game show host voice or was that just me?!
Let's thank little miss stephanie & katie for hosting this today, shall we?


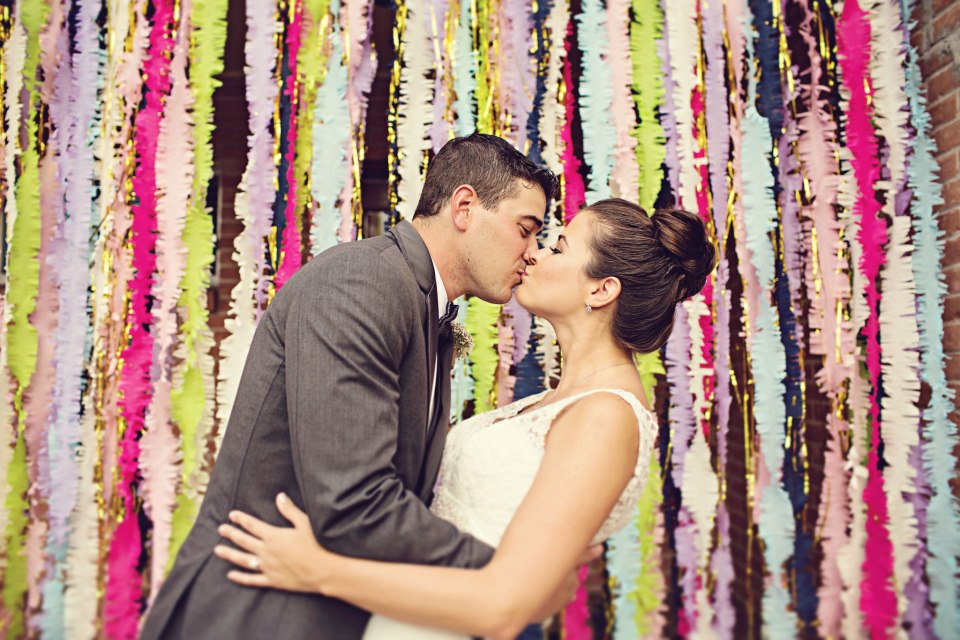
I LIVE for DIY, LOVE IT!!! So when my cousin Michelle asked me to help her make a streamer backdrop for her wedding, of course I said yes!
Who doesn’t like to play around in brightly colored paper with hot glue?
The church had some.. let's just say "boring" brick walls for photo ops... 
We spiced it up a little!

Insert: 
the pic that won us over! ahhhhhh (angels!)


What you will need:
Glue gun / sticks (we almost forgot those)
Dowel rods
Scissors


Dowel Rods: We used (3) 3'x1" dowels purchased from Hobby Lobby. 

Crepe Paper FOLDED: THIS IS IMPORTANT! Determine the colors you wish to use, we used 12 packs of FOLDED paper because we wanted it to look very full.
*Do NOT buy the little rolls you see in party city, its not the same.
The Gold Fringe, IMO, is VERY important and adds a different texture to the overall look. Plus it's shiny and we all like shiny things!!  

We started by dividing the crepe paper into (5) ~3 inch sections, 
where we then made ~1/2" cuts on either side (leave a 1" median- didnt know what else to call it) to create the fridge look.
 
When you begin to unroll the crepe paper, it will look like this...

Once we finished cutting all of our paper, the hot gluing began.. 

We left each rod separate, simply to keep this big guy reasonably mobile.  
I started by gluing the gold fringe to the rods in sections, since we obviously didn't buy enough to cover 9' (save that $$$ honey!) 


 **When gluing... place the hot glue directly on the crepe paper, its thick enough not to burn you and allows for better placement..

Next, JUST START GLUING! 
I used one color family at a time to make sure there was adequate spacing...

It was super colorful by the end, which we LOVED!

There was a team of 3 working on this project (4 if you count Dakota “helping from the ottoman”) and it took us about 2 hours.
So, turn on the DVR (in our case, Scandal, love me some Kerri Washington) and get to cuttin’!
 

**For transportation: we laid all 3 rods on a sheet and loosely rolled it... it worked pretty well. Command hooks were used for hanging. 

Oh, you want to see the professional pics? I’m glad you asked…


We actually used the backdrop in two locations… the wedding party took individual shots at the church and then we moved the little booger on over to the venue where lots of people took advantage of the fun backdrop! Live in COLOR!!!

Thursday, November 1, 2012

1 year "Paper" Anniversary Plaque

There are particular blogs I read daily. Some people read the daily paper with their coffee, I chose to read the ramblings of Stephanie & Katie... they are my bff's and don’t even know it! So when they announced their new LinkUp
“Saw it. Pinned it. Did it.”
I jumped at the opportunity to post my first of many DIY projects.
                    
I racked my brain as to what to do for my new hubby for our 1 year anniversary. We were already spending money on our trip so I didn’t want to spend a ton, plus, I’m a lover of DIY and I will use any excuse to make something myself. I perused pinterest and esty… NOTHING. I was going crazy. 


So for this project I took the paper anniversary quite literally and used……… PAPER! That was a thinker.

For inspiration I took some of these ideas and threw it into one!


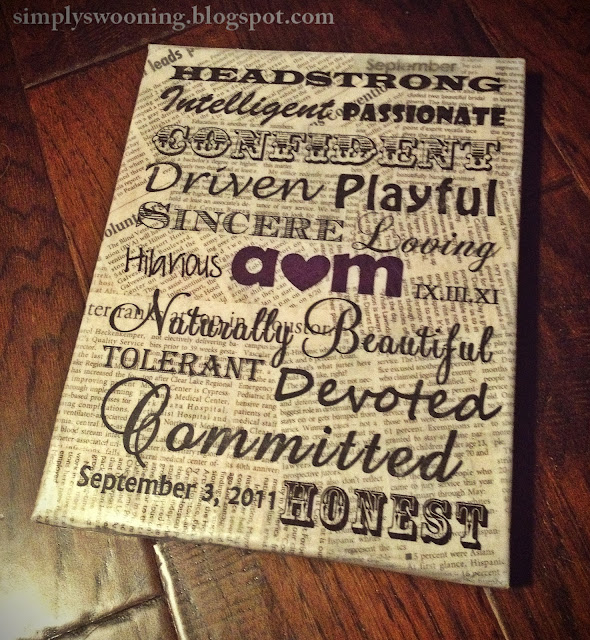
For our wedding, Pastor Larry asked Michael & I to come up with words describing one another and he would incorporate them during our ceremony.
                            Let’s just say, we know each other well and
           I don’t think either one of us were surprised by the chosen words.
I hope that this plaque sits in my home forever, whether it be on a bookshelf or hanging on the wall. Hell, maybe my kids will love it and want it one day to remember their Ma & Pa. God I hope they never call us that! Sure most people when looking at it at first glance wont know what the words stand for or even the roman numerals, but I kinda think that’s what makes it special.

So, let’s get to it… how to make a simple diy paper anniversary plaque.

My dad saved a newspaper from the day that Michael and I tied the knot, but you can use any background. I even thought of using a map of the location since our wedding was semi-destination.

What you will need:


1.   8x10 canvas, mine is from Hobby Lobby. I made it small so that it can subtly sit anywhere in my room as decor.

2.   Jar of Mod Podge, also from Hobby Lobby.  (ALWAYS use a 40% coupon!)

3.   Foam brush, found anywhere! I feel that the foam brush allows the mod podge to coat evenly.

4.   Newspaper, map, etc. for the background.


     Clear an area where the canvas can sit overnight. I propped the canvas over a paint can, so I could completely wrap the newspaper over the sides of the canvas to the back for complete coverage.


First lightly cover the canvas with a layer of mod podge (it has a glue consistency) so the newspaper has something to adhere to.


     Then I cut various sections out of the newspaper usually around 4”x4”… some were 3”x6”, some were 1”x2”. Just try and keep the print small so that the words you chose for the plaque aren’t competing with a bold newspaper headline. Avoid any print with a picture in the background or overly bold text. 


Lay the strips of newspaper in various angles and all different directions so that it looks random.. you really can’t mess this part up. Along the way smooth out any bumps so the newspaper is flat on the canvas.

     When the canvas is completely covered by the newspaper, again give it an all over coat of the mod podge and let it dry over night.

     Finally, you can use any print program that you want, I used power point simply because it is already set to an 8x11 frame and allows me to move the words in different text boxes to the location of my liking. Choose your words, your favorite quote, a picture of the two of you, etc. and arrange to your liking.


Here is where you will use your 3M CLEAR full sheet labels. You will need an inkjet printer. Use these labels as you would a sheet of paper, place it in your printer and print! It may need to dry a few minutes to avoid smudging. Next peel off the backing and align the label with your newspaper covered canvas and STICK! Viola! Trim any edges or fold them over the sides of the canvas, you wont see much of a seam.

Last, take your mod podge once again and give it a good final coat. Don’t worry, it comes out clear! I'm loving how it turned out & the hubby really appreciated how much thought I put into it.


Hopefully this little guy will be sitting on our bookshelves for years to come!
                            Dream Job #25: Professional Pinterest Pinner 


Tuesday, October 30, 2012

Fredericksburg Shopping Trip

I really look forward to our annual girl’s trip to Fredericksburg, TX. My mom, aunts, cousin (Taryn) and I scour the shops of the little ole town until we drop, quite literally.
  

We curse the shops that have tape across the big comfy chairs when our feet are pounding… how am I supposed to test out and see if I want to pay $2K for your cow hide chair if I can’t sit in it?! JOKING! But not at the prices… place has gotten PRICEY! I’m usually very much a Forever 21, H&M, Target kind of girl; but something about these little boutiques makes my heart pitter patter. Plus it’s nice to NOT have the same clothes as every other “trendy” girl in town.

Taryn & I
We were all so excited for our shopping weekend, not to mention the below 90 degree temps we were expecting! Mr. Weatherman said we were going to have beautiful sunny days, high around 68. WRONG! No way, weathermen don’t lie! The high was 56, BIG DIFFERENCE to this Texas girl. What’s a girl to do?

                                                       Drink up, until you warm up!


They had Pink Margaritas too, to promote Breast Cancer Awareness… of course, we HAD to get one!


There are always "characters" in the town and it never fails, you will always see something picture-worthy. This guy had EVERYONE talkin..

The best part, the Food and Wine Festival was in town. Needless to say, we ate AND drank, A LOT. I swear I gained 10lbs. You try leaving Fiesta Winery without buying 3 bottles of vino after trying nearly every wine on the list! Impossible! But I always say… PROMOTE small businesses!


The décor is always so beautiful and I always get great ideas for decorating and DIY. Look for these upcoming pinterest-worthy projects:


LOVED this unique chandelier!
"Hello Sexy" ha.
 
Spray branches, add mirror... easy enough.
I see a headboard in my future.


AND.... THE most swoon-worthy item of the trip… the zebra stenciled acid stained cowhide WITH gold accents!!!!!!! Ahhhhh.. she can be yours for $750.